
# SECTION 7: Taking an Offer
# Step 1 — Receiving an Offer
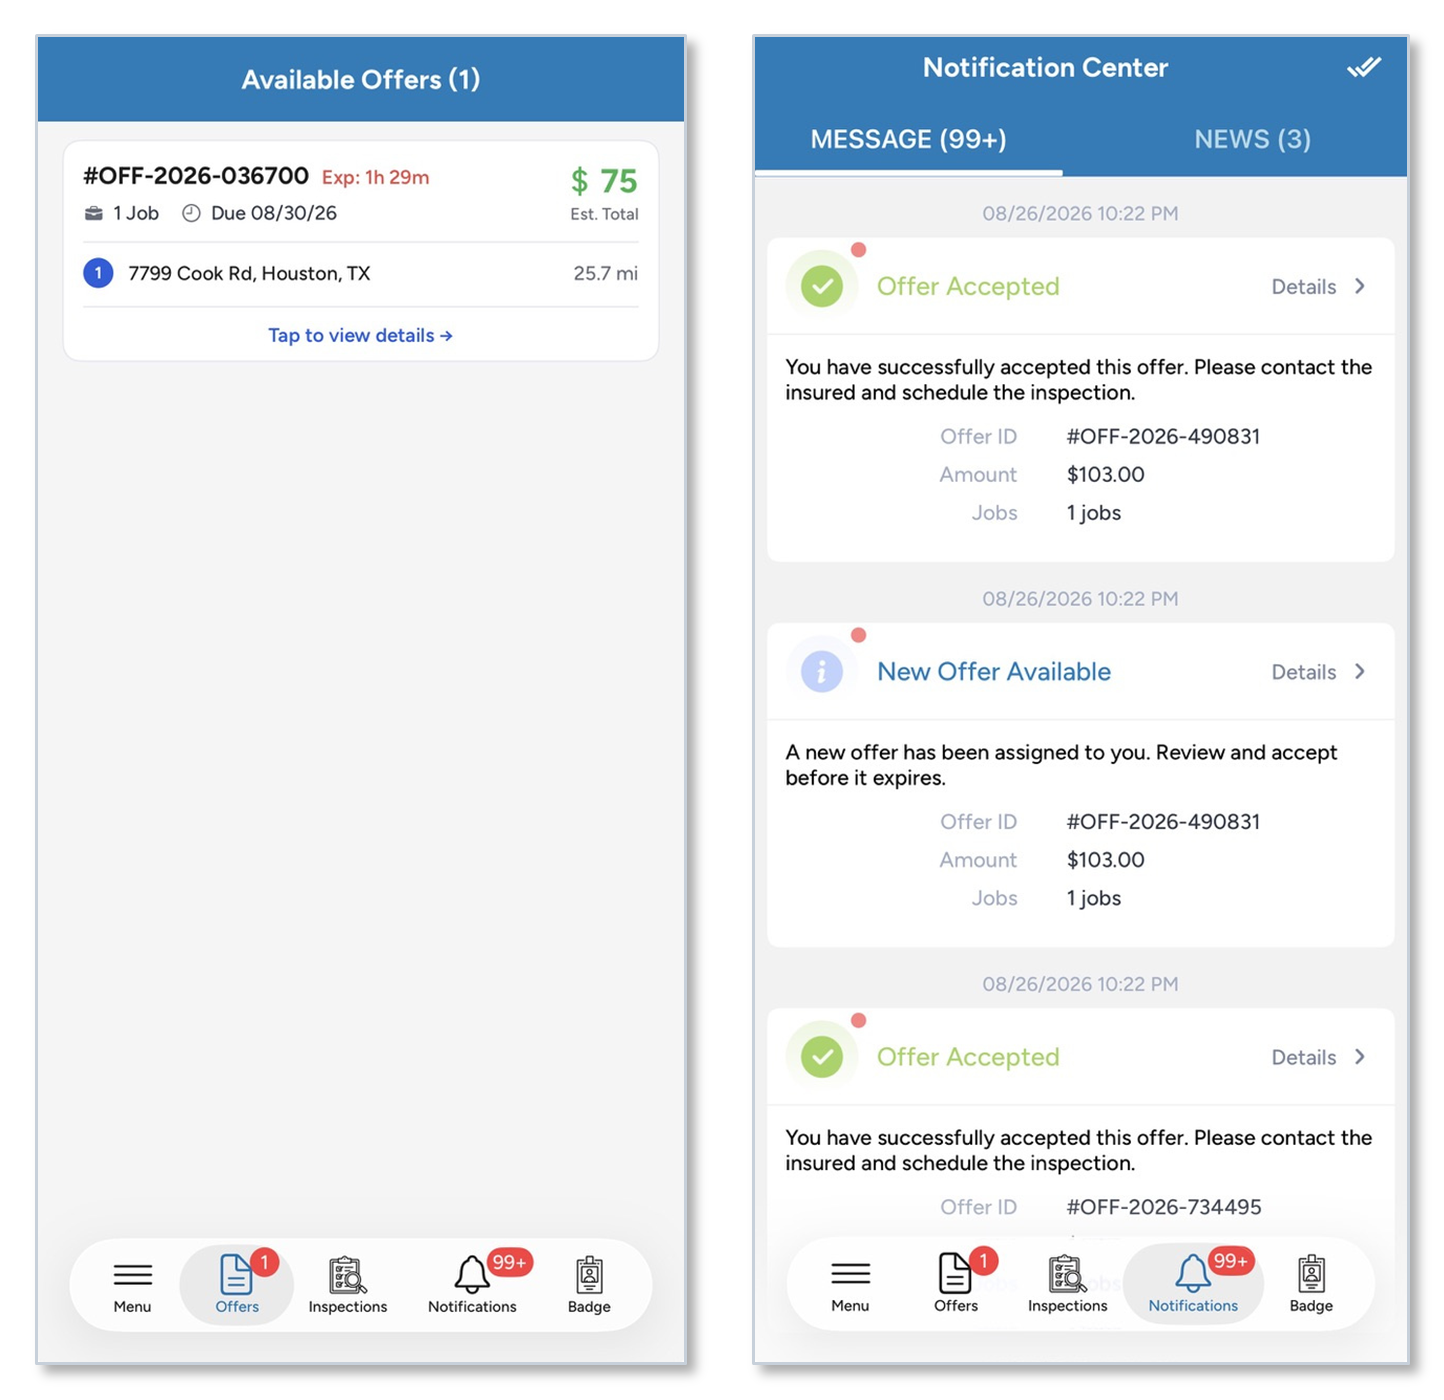
Offers tab and Notifications tab.
Where offers arrive
- The Offers tab is the list. Every offer sent to you sits here as a card, and the count appears on the tab badge.
- The Notifications tab is the history. If your phone was off, the notification is still here. Tap Details to jump to the offer.
- A notification is not a reset. The 90 minutes started when the coordinator sent the offer, not when you read about it.
What you must do
- Check the Offers tab whenever the badge is not zero.
- Open the offer and answer it within 90 minutes.
Timing
The 90-minute countdown starts when the coordinator sends the offer. An offer left unread is already partly gone. Answer or reject it as soon as you see it.
# Step 2 — Reviewing the Offer Card
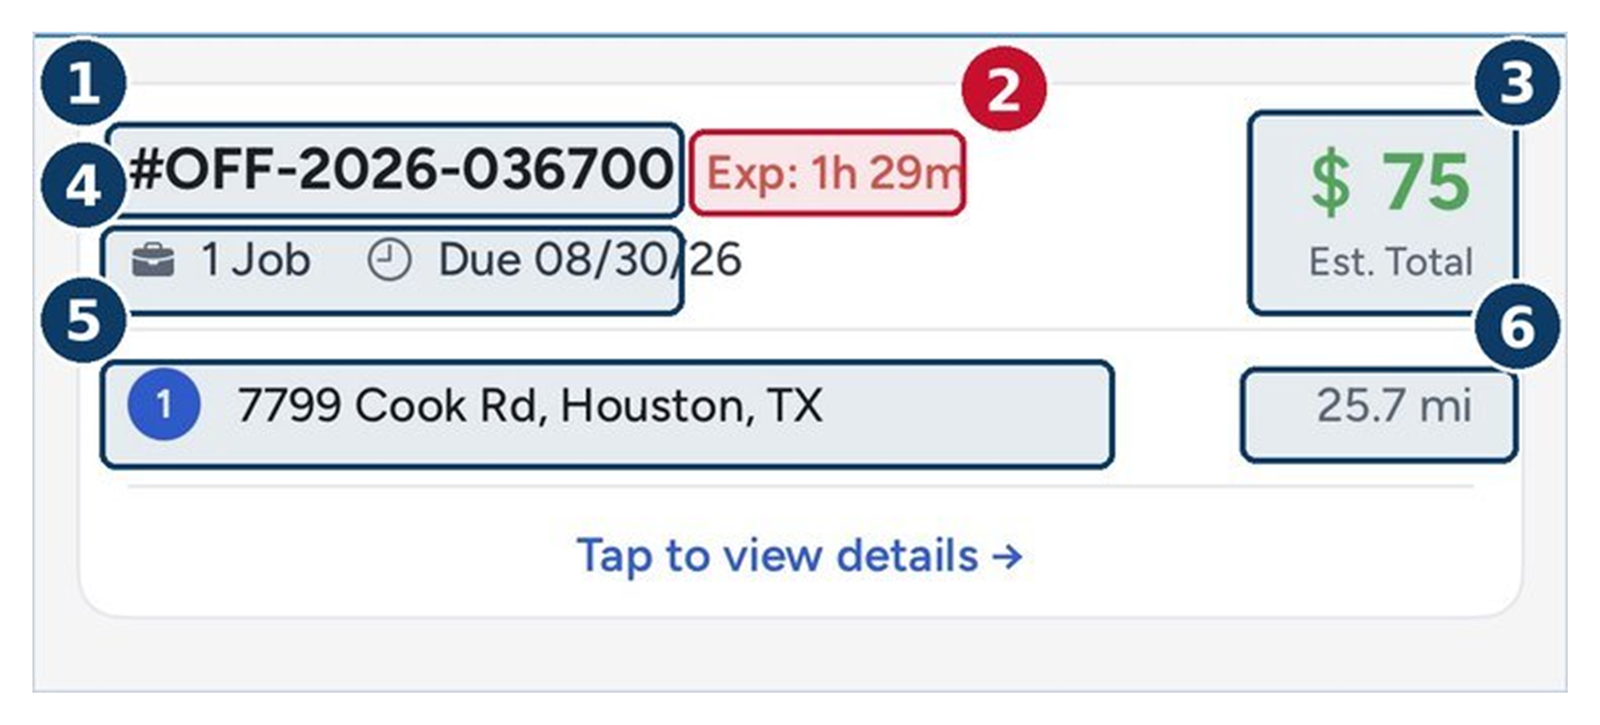
Offer card in the Offers tab.
What the offer card shows
- Offer ID — a unique identifier generated for each offer
- Countdown — time left to answer; watch this one
- Total payment — what you will be paid, all components included
- Jobs and due date — one job per offer, and when it must be completed by
- Address — where you are going
- Distance — from your home base
Deciding from the card
You can decide on most offers from this card alone. Opening the offer does not stop or extend the countdown.
# Step 3 — Opening the Offer for Full Detail
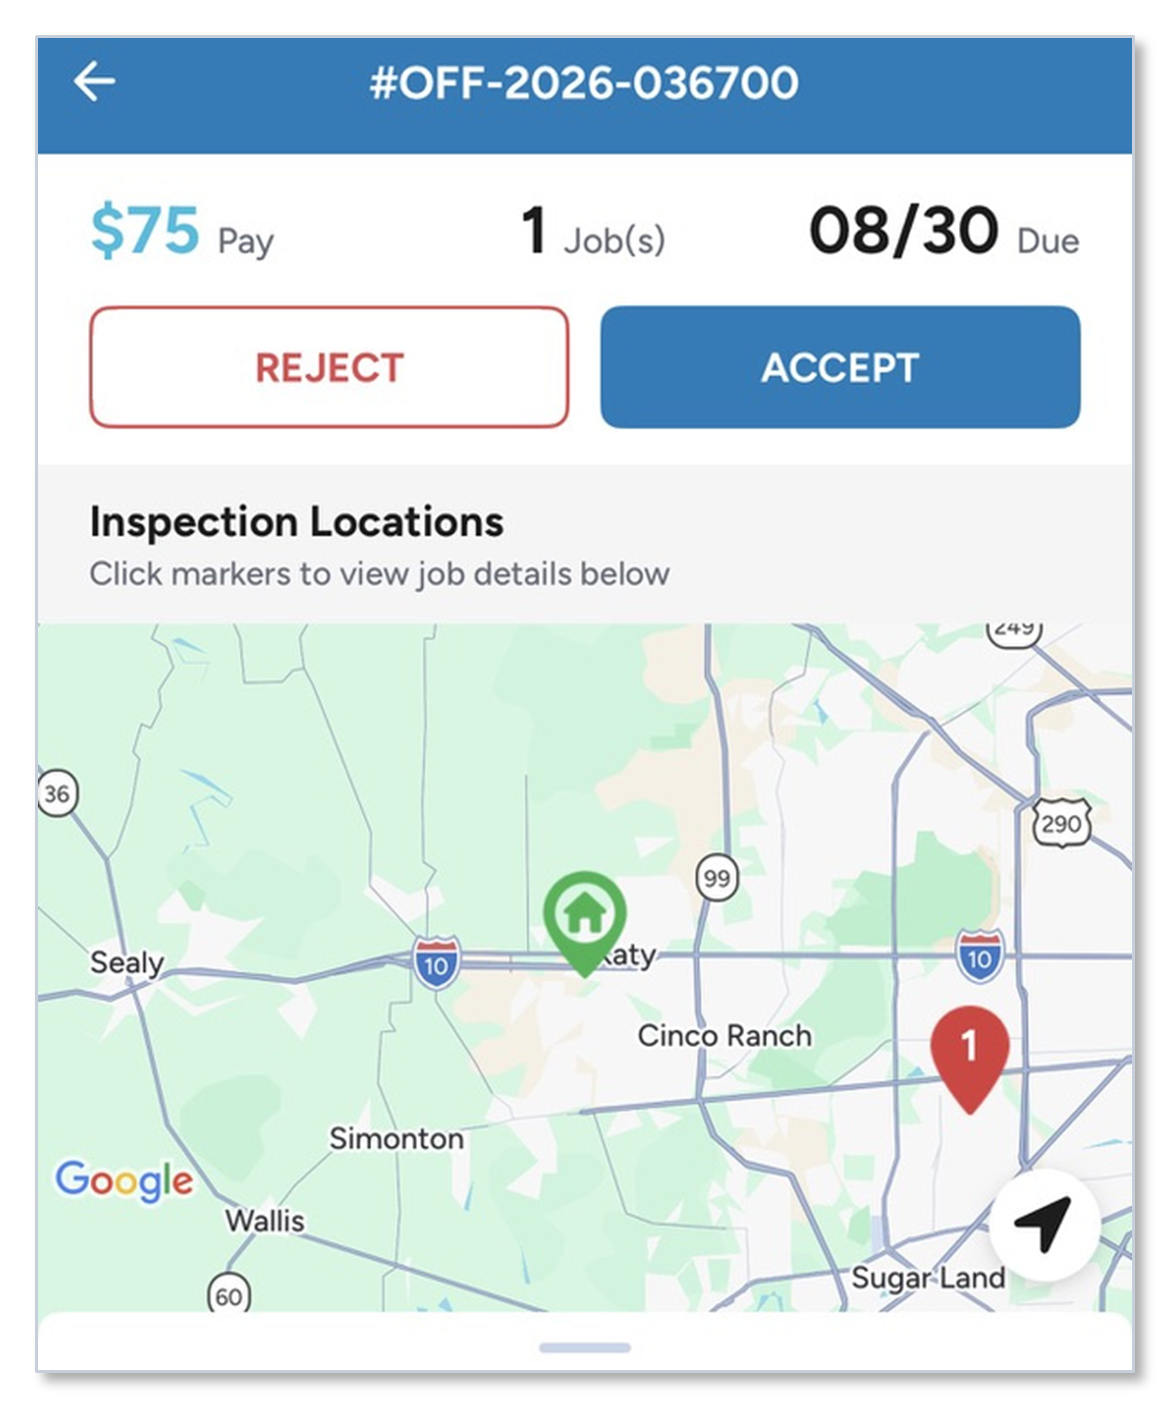
Offer detail view — answer buttons above the map.
Open the offer
- Tap the offer card. The offer opens on the map, with the two answer buttons above it.
What the detail view shows
- Offer ID — confirm you have the right offer
- Payment — the total you will be paid for this assignment
- Job(s) — the number of claims in the offer; one per offer in the current release
- Due — the date it must be completed by
- REJECT — decline the offer
- ACCEPT — take the assignment
- Green house marker — your home base
- Numbered red pin — the property you would be flying
REJECT and ACCEPT sit above the map, so you do not have to scroll to answer.
Checking the drive
Use the map to sanity-check the drive and the site before you commit. Tapping the pin and tapping the card below it do the same thing.
# Step 4 — Confirming You Can Take the Assignment
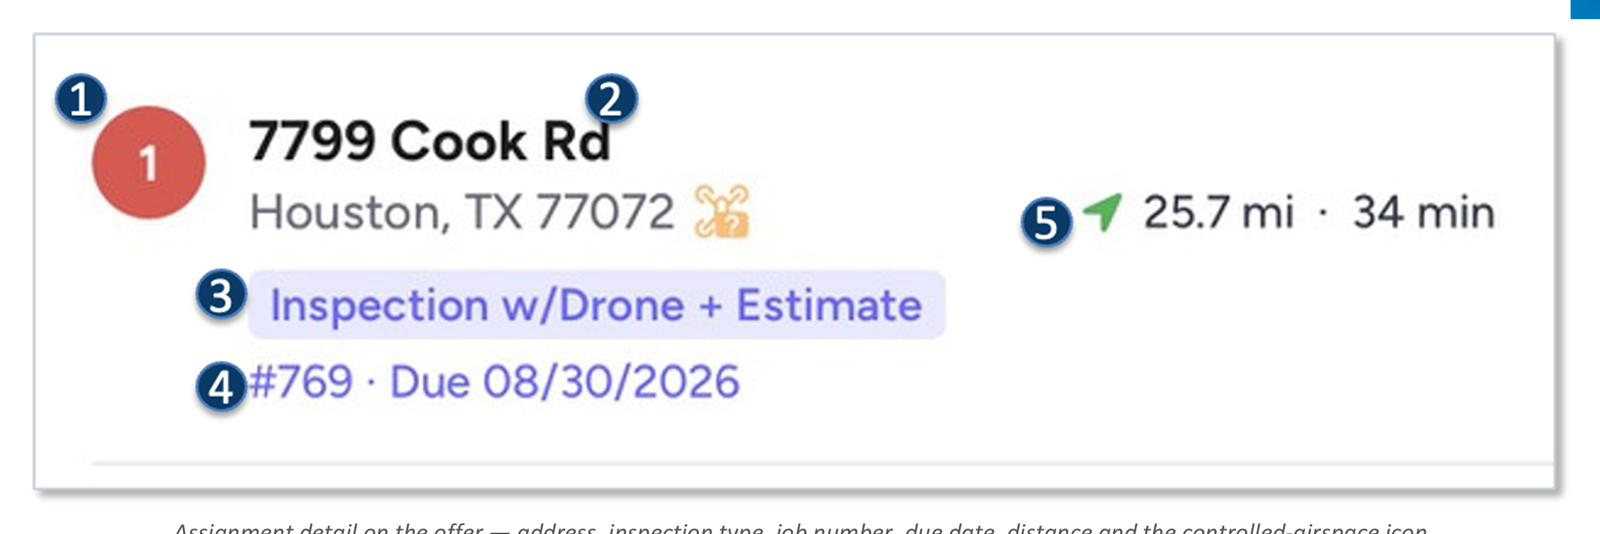
Assignment detail on the offer — address, inspection type, job number, due date, distance and the controlled-airspace icon.
Check these before you answer
- Job marker — the numbered pin for this job
- Address — where you are going
- Inspection type — standard or drone, estimate or not
- Job number and due date — the number to quote, and the deadline
- Distance and drive time — from your home base to the door
- Drone icon with a question mark — controlled airspace
Assignment eligibility
- Accept only when you can meet the 4-hour contact deadline and the 2-day scheduling and completion window.
- Consider your availability, capacity, existing appointments and the drive before you commit.
- If the assignment does not fit, reject it promptly so it can be sent to someone else.
Controlled airspace — check before you accept
A drone icon with a question mark on the address line means controlled airspace. That job needs a COA uploaded before you can complete it. Check for it before you accept, not after. It is your responsibility to confirm the required airspace authorization has been submitted and approved.
# Step 5 — Accepting the Offer
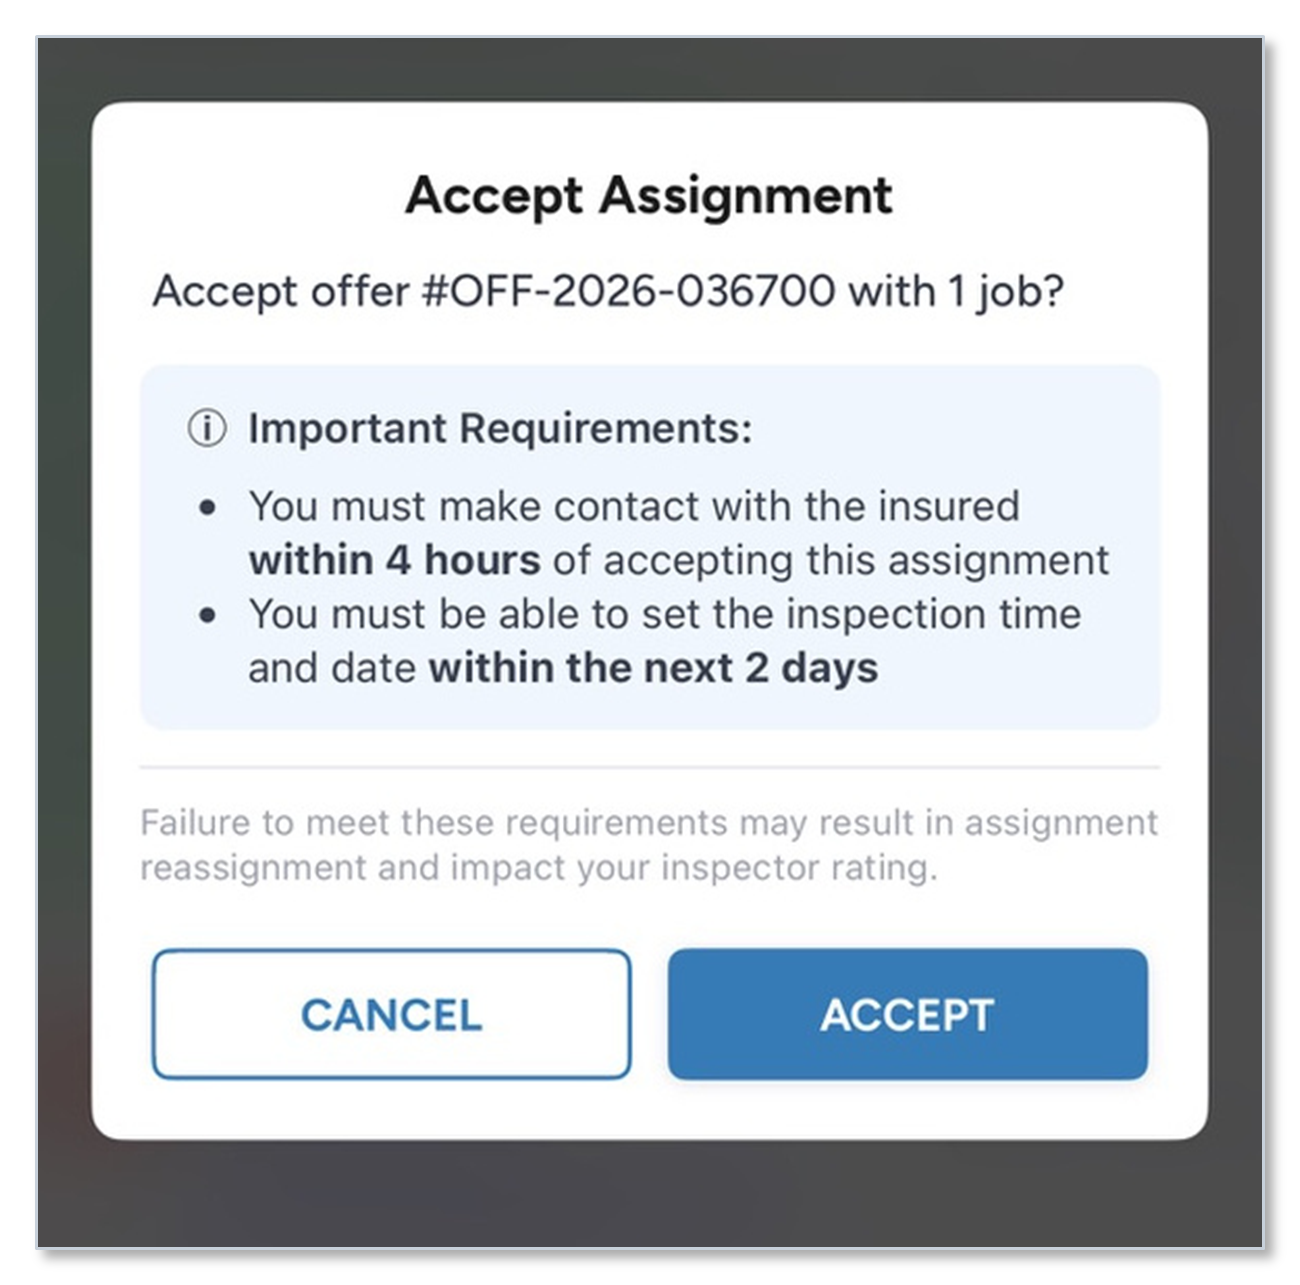
Accept Assignment confirmation dialog.
How to accept
- Tap ACCEPT on the offer detail view.
- The Accept Assignment dialog opens. It repeats the two deadlines, because that is what you are agreeing to.
- Confirm you can meet both, then tap ACCEPT in the dialog.
The two commitments in the dialog
- 4 hours to make contact with the insured
- 2 days to set the inspection time and date
If you are not sure
- CANCEL leaves the offer in your list, untouched. Nothing is committed until you tap ACCEPT on this dialog.
Before you tap ACCEPT
Think about the drive, the airspace and the rest of your day now, not afterwards.
If you miss either deadline
Failure to meet these requirements may result in assignment reassignment and impact your pilot rating.
# Step 6 — What Happens the Moment You Accept
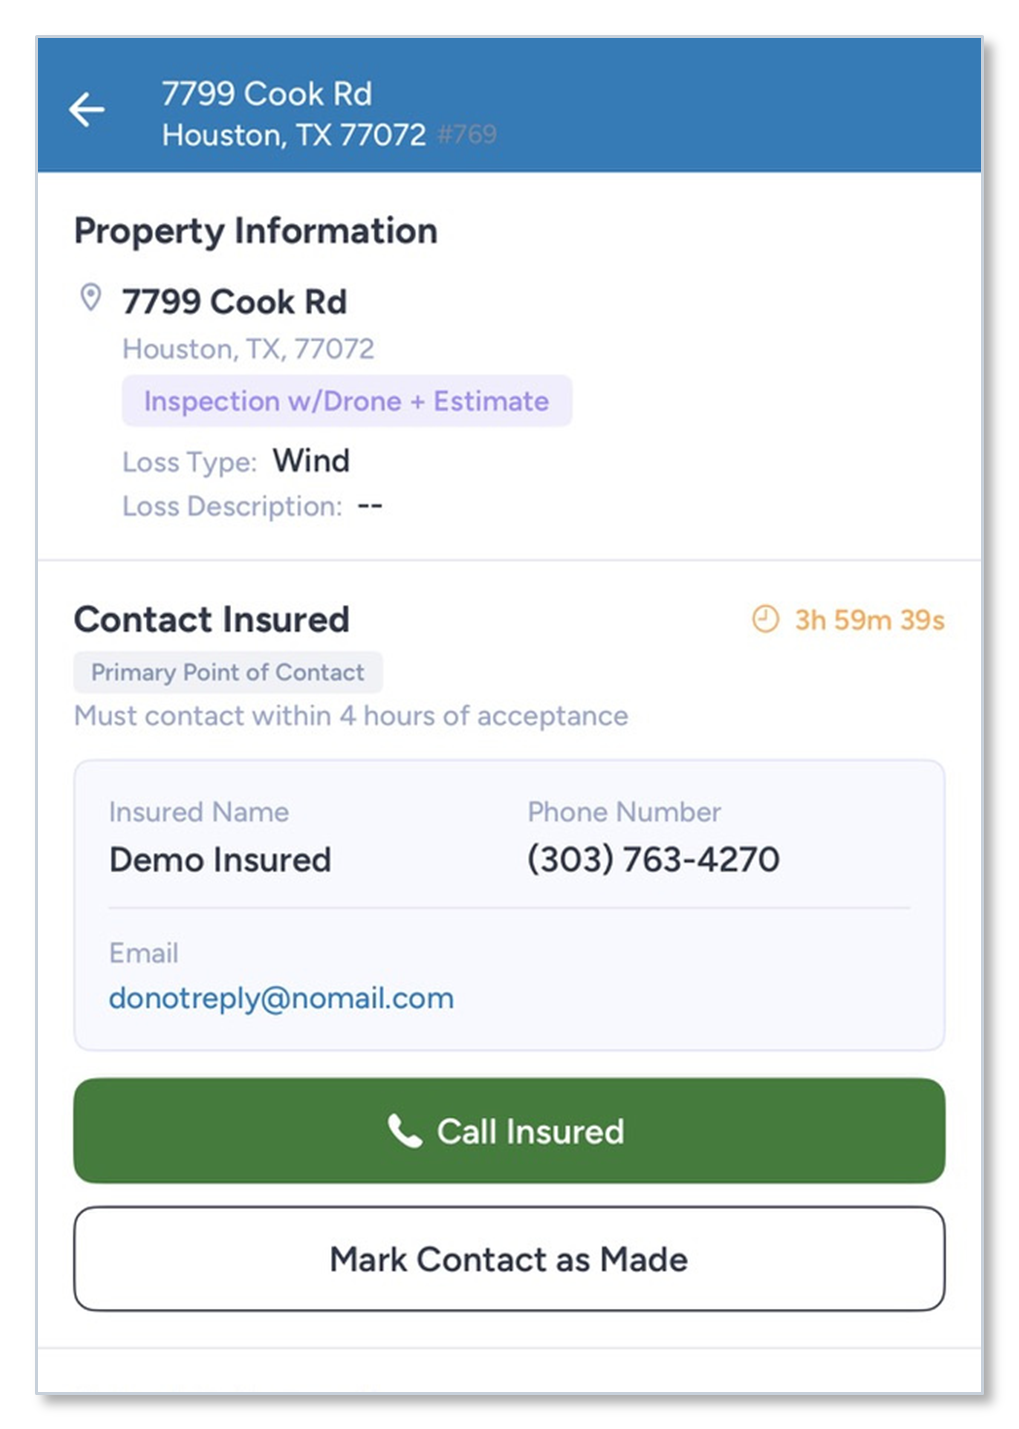
The app opens the Contact tab for the accepted assignment.
Four things happen immediately
- The offer leaves your Offers tab. It is no longer available to anyone else.
- The assignment appears in Inspections. This is now your work to finish.
- The app opens the Contact tab for you. It puts you where the next action is.
- Your 4-hour clock starts. It starts now, not when you next open the app.
What you do next
- Stay on the Contact tab and work Task 1 — contacting the insured.
- Do not close the application and come back to it later.
The clock does not wait
Your 4-hour contact clock starts at the moment of acceptance — not when you next open the app. Work the Contact tab straight away.
# Rejecting an Offer You Cannot Take
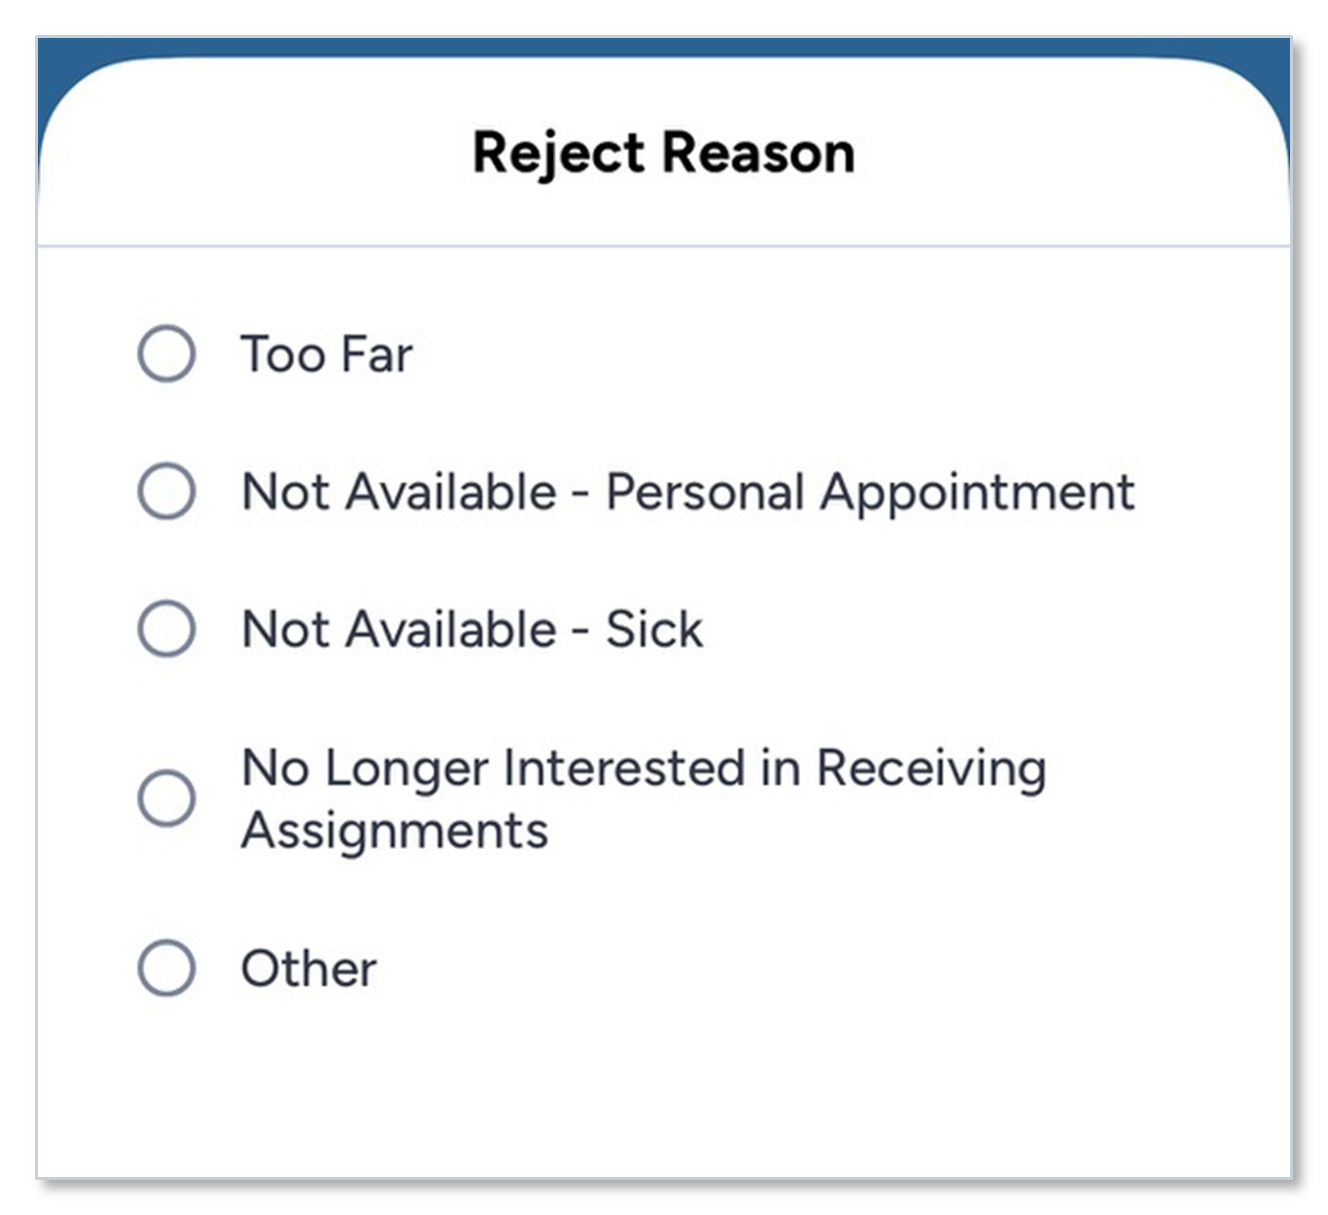
Reject Reason list.
Rejecting does not count against you. Letting an offer expire is worse: the full 90 minutes is lost before your coordinator can send it to anyone else.
How to reject
- Tap REJECT on the offer.
- Choose a Reject Reason: Too Far, Not Available – Personal Appointment, Not Available – Sick, No Longer Interested in Receiving Assignments, or Other.
- Tap CONFIRM. CONFIRM stays inactive until you choose a reason.
What happens next
- The offer leaves your list and goes straight back to your coordinator to send to someone else.
- Your reason is logged and saved on the claim, so your coordinator can see why.
- If the same claim is rejected twice by anyone, it enters an escalation workflow.
Do not reject to take a day off
Do not use No Longer Interested in Receiving Assignments to take time off — it removes you from the dispatch pool. Change your status in the Menu tab instead.